If you have been following along with our series of tips for editing photos on your iPhone (and Android), I hope that you are starting to build your confidence in your mobile photography skills. It’s a fact that when you know how you can change a photo post-shooting, you are freed up to truly enjoy the art of capturing the photo.
Sure, it might seem too bright or too dark, but go ahead and shoot. Grab the shot, take a quick look at the thumbnail and shoot again if there is blurring, etc. Then move on to the next photo!
Next, when you have some time, experiment with using Auto adjustments and more to see if you like the photo better. You are building good editing skills and before you know it – you’ll know exactly which tools can take that photo from so-so to gorgeous.
Let’s look at making changes to your photos by adjusting the Highlights and Shadows settings.
Getting Started
This tutorial is based on the iPhone’s iOS 15, so if you have problems following along, check your operating system to see if you need to upgrade. If you aren’t sure how to do that, watch this short video.
Adjusting the Highlights Settings
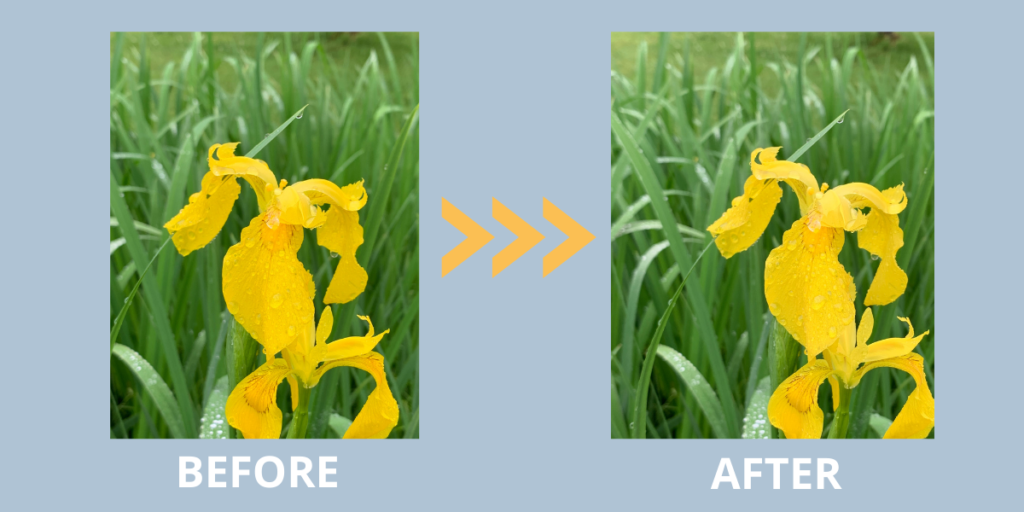
For starters, the “highlights” are the areas in your photos with the most light hitting them. If those spots have lost detail due to overexposure, or the opposite has happened and they appear too dim, they could benefit from an adjustment to the Highlights settings.
When you start moving the slider for Highlights to the right (higher) or left (lower), you will immediately be able to identify the portion of your photograph that has received the most light when you shot it. These areas will be the ones making the bigger changes!
As I have said before, your mobile phone is a smarty-pants when it comes to determining how much light to let into its camera sensor. So the changes you might make will be small, but could really make a difference depending on your goals for the photo.
The photo that I made adjustments to is of a yellow iris bloom with water droplets on the petals and leaves. I wanted to draw more attention to those droplets. Increasing the Highlights to 30+ accomplished that for me! Take a look at the before and after.
Adjusting the Shadows Settings
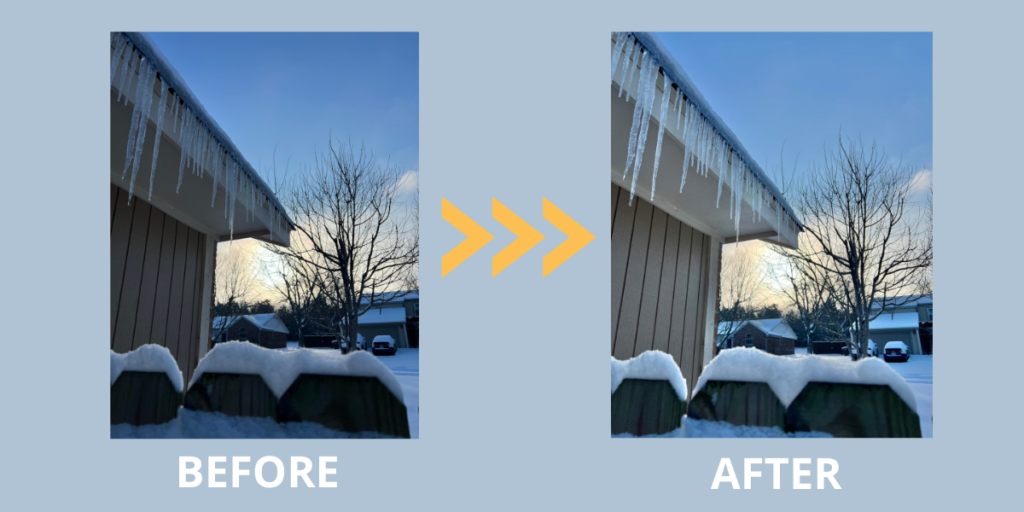
Now let’s look at changes using the Shadows setting. The opposite of highlights, shadows are the areas in your photo with the least amount of light exposing them. If you have photographed them too darkly, these spots may lack visual detail. They also may lose contrast if they are too light compared to their surroundings. With the right balance, the intensity of shadows can lend to more depth and dimension in your photo.
To demonstrate making adjustments to the Shadows settings, I have used a recent photo of icicles. I want to bring more light into this area of the photo in hopes of drawing your eye to the icicles and the play of light through them. This photo was shot fairly early in the morning, so the sun doesn’t appear that strong in the background and isn’t providing the backdrop I was hoping for. Pushing up the Shadows setting to 100+ provides a subtle shift to the light and gives the icicles the look I was hoping for.
For Our Android-User Friends
While we’ve been focusing on using the onboard photo editor for the iPhone, I know that so many of you take your photos with Android and Google phones. Even though I don’t own one of these, I haven’t forgotten you! I will always try to find a good online source for you to continue your learning. Here’s a good one.
Now It’s Your Turn to Experiment
I hope you’ll take the time to edit some of your photos to learn more about how making changes to the Highlights and Shadows can make subtle changes to your photos and hopefully enhance them in the ways you are hoping for. Happy editing!
As we continue this series on editing photos, is there something you want to learn? Please comment below and let us know! Thanks for reading.


0 Comments