The photo editors in smartphones have tools that help you fine-tune both the light elements and the color elements in your photos. We have already taken a closer look and experimented with the first 3 of the light tools – Exposure, Highlights, and Shadows. Now let’s look at the other 3 light tools – Contrast, Brightness, and Black Point.
As we explore making adjustments to your photos with Contrast and Brightness, I bet you have a pretty good idea of what those changes will look like just based on the names of the tools. I mean, what else could “contrast” and “brightness” mean? But you may not know what making changes to the Black Point will do to your photos. Stay with me and I’ll tell you later what Black Point is and how changing it can make changes to your photos.
Getting Started
This tutorial is based on the iPhone’s iOS 15, so if you have problems following along, check your operating system to see if you need to upgrade. If you aren’t sure how to do that, watch this short video.
Why Should You Adjust the Contrast?
The Contrast settings in your mobile phone photographs will affect both the bright areas and the dark areas at the same time. So if you increase the Contrast settings it will make the darks darker and consequently the brights brighter. And just the opposite will happen when you decrease the Contrast.
To help you better understand when you will want to make this adjustment, let’s look at a photo and experiment to see what happens.
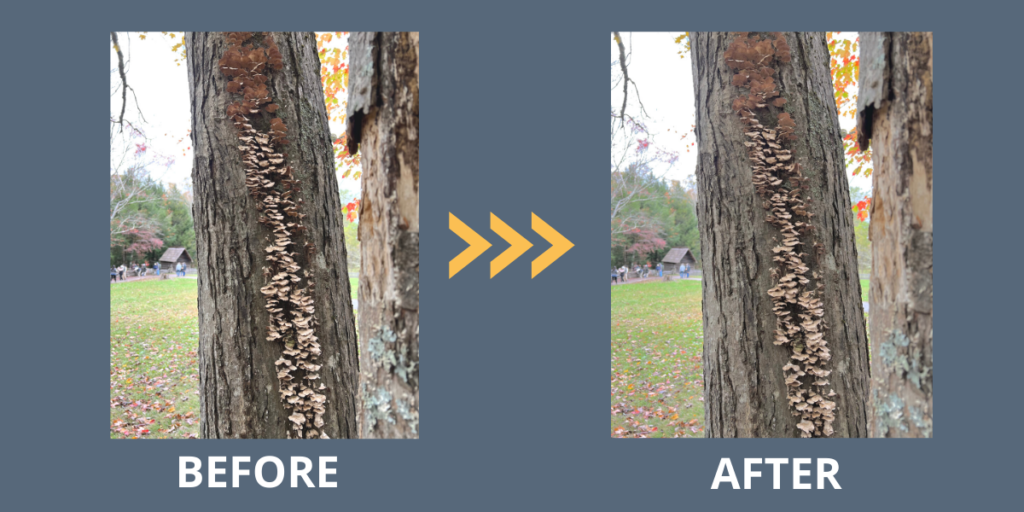
I’m wanting to bring more clarity to a photo of some fungi growing on a tree in the Smoky Mountains National Park. I struggled with this photo when I took it, knowing that I probably wouldn’t get the light just right. My focus is on the details of the fungi and they are in the darker part of the photo.
As I experimented with the Contrast settings, I discovered that increasing the Contrast further obscured the details of the fungi. But to my delight, reducing the Contrast by 33 helped me to shed more light on them.
Why Should You Adjust the Brightness?
Making adjustments to Brightness isn’t as obvious as it might seem. Behind the scenes, Brightness is a mid-tone luminance adjustment. If you are familiar with histograms of photos, Brightness affects the middle of the graph.
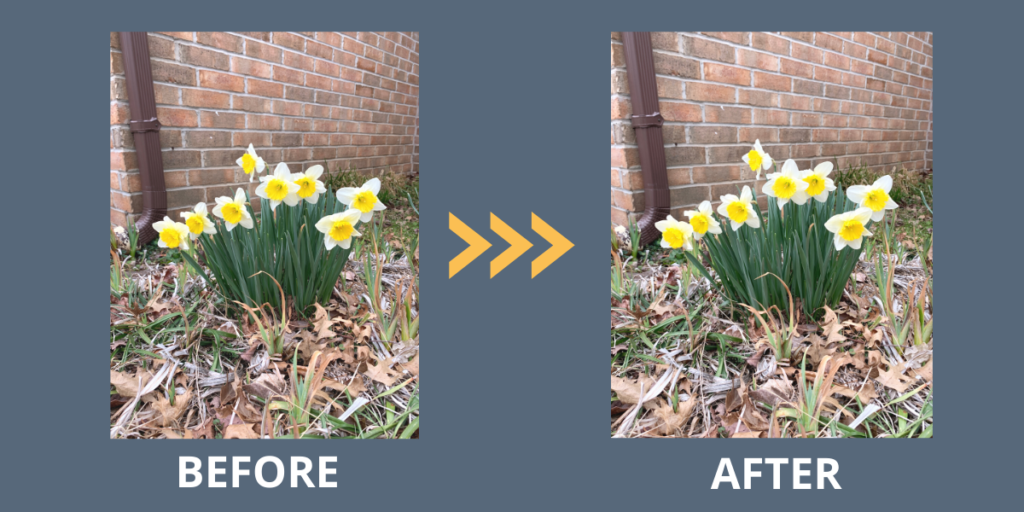
 To truly understand the changes you can make to your photos by adjusting Brightness you just have to experiment. I tested this out on a photo of early spring daffodils in a planting bed next to a brown brick wall. With some much brown in the background and foreground, you would think that it was draw the eye to the yellow blooms.
But I still wanted a little more pop, so I experimented with Brightness – both reducing and increasing it. I found the magic I was looking for by increasing it by 33 and that really brought out those sweet blooms.
Why Should You Adjust the Brightness?
Did you know already what Black Point editing refers to? Basically, it adjusts the dark areas of your photographs. In the histogram we referred to earlier, Black Point affects the left side of the graph.
A Black Point is a very small area (or areas) of the image that is quite dark. Ideally, you don’t want this part of your photograph to be too large.
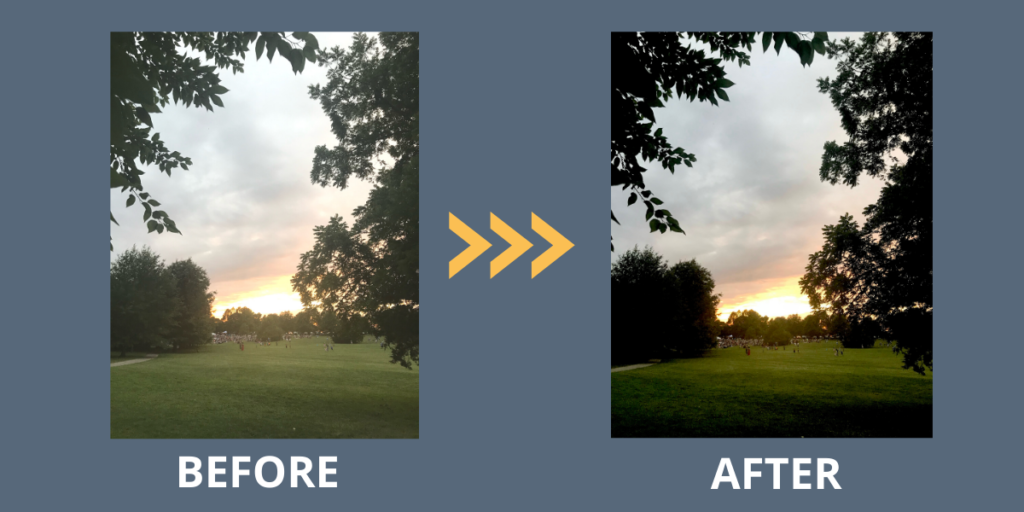
To experiment with Black Point adjustments, I chose a photo of a sunset at the park that I had framed using tree branches. With the sunset in the background, these branches already appeared dark. I had some fun with testing Black Point out on this photo just to see what it could do. When I decreased it, the whole photo had a bit of a whitewash screen over it. But when I increased it, those tree branches in the framing area became quite a bit darker and I really like the effect.
For Our Android-User Friends
While we’ve been focusing on using the onboard photo editor for the iPhone, I know that so many of you take your photos with Android and Google phones. Even though I don’t own one of these, I haven’t forgotten you! I will always try to find a good online source for you to continue your learning. Here’s a good one.
Now It’s Your Turn to Experiment
And now it’s your turn! I hope you’ll take some time to edit some of your photos to learn more about how making changes to the settings for Contrast, Brightness and Black Point can make a difference to the photos you are taking with your iPhone. Happy editing!
As we continue this series on editing photos, is there something you want to learn? Please comment below and let us know! Thanks for reading.


0 Comments