Have you ever shared a photo from your iPhone to your computer and then found out that it wouldn’t work in certain design and video editing apps? That’s because your phone’s operating system has stored that photo in the High-Efficiency Image File (HEIC) format to help save some storage space on your phone.
Many design and video editing apps and even some social media apps require that your photos be a JPEG or PNG file, which definitely creates a problem. But don’t worry. I have a solution for you.
What’s HEIC?
A HEIC file is Apple’s own version of the High-Efficiency Image File format and it serves a very important purpose in your phone’s storage space. It saves space without losing image quality. So that’s all good, right?
Yes, it’s great for your phone and its rapidly filling storage system. But when you get the photo out of your iCloud storage and try to use it in an app that requires a JPG or PNG file, then you’ve got a problem.
The same goes for when someone else tries to use a shared photo from you.
Let’s look at 3 ways you can make changes regarding the format of your photos on your iPhone.
How to Change the Storage Format
If you decide that you would rather just have your phone store all photos as JPEGs in the first, place, here’s how you do that.
- Open your phone’s Settings
- Tap on Camera
- Tap on Formats
- Now choose “Most Compatible”
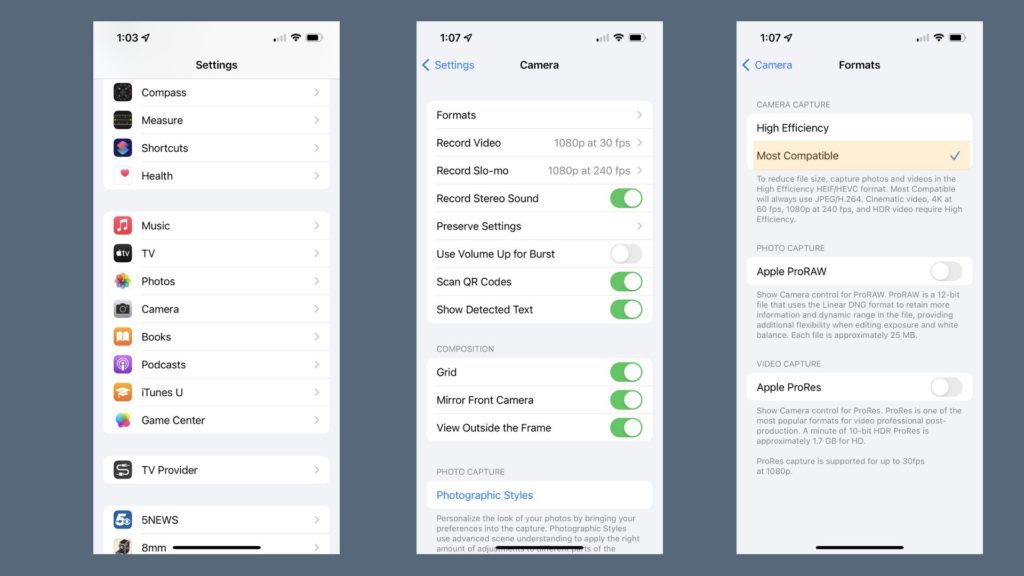
But wait! You might not want to do this. Storage can be tough to manage. Why not just tell your phone how you want it to export your photos?
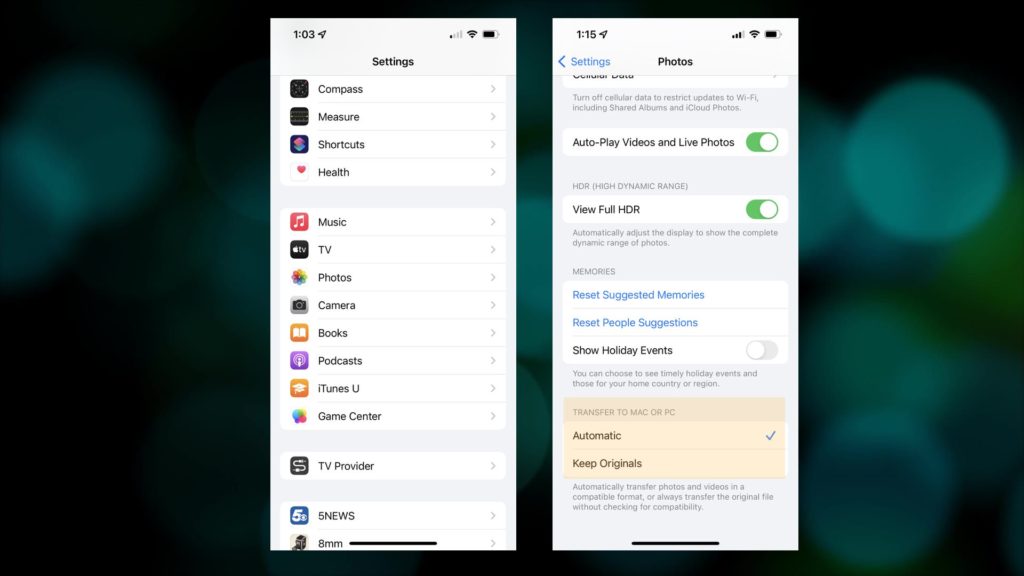
How To Change the Export Format
Here’s how to tell your phone that you want it to store your photos in HEIC format to save storage space, but export them as JPEGs.
- Go to Settings
- Tape on Photos
- Scroll to the bottom of the next screen and find “Transfer to Mac or PC.” Choose “Automatic.”
How To Convert on Mac
If you already have some HEIC files on your Mac, then you’ll need to convert them.
There are browser-based apps that can convert these files for you, but there’s no reason to risk accidentally downloading malicious files from a site you aren’t familiar with.
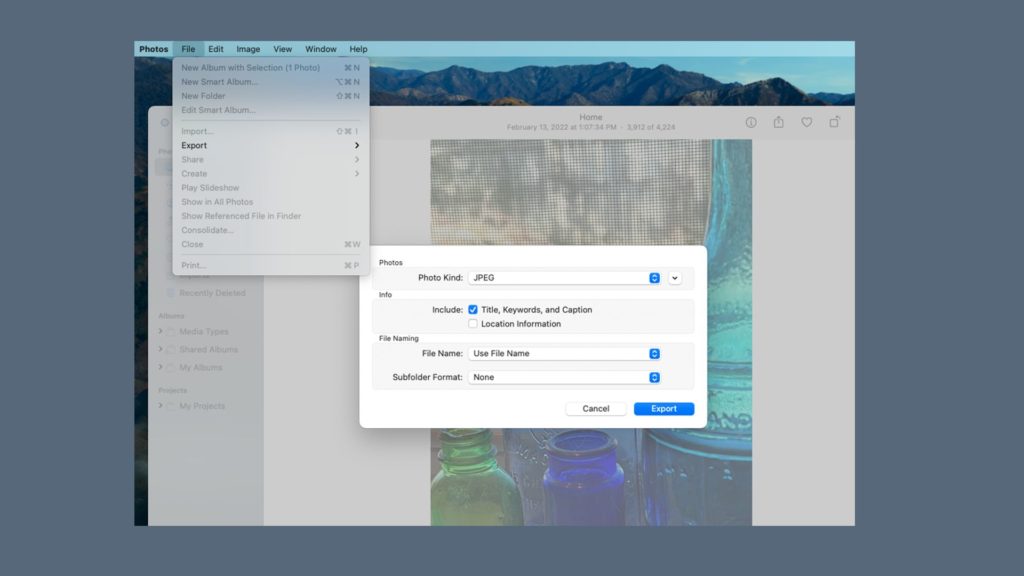
From within your Mac’s iPhotos folders, just open the photo and choose File>Export to export the photo anywhere you want on your computer as a JPEG or PNG file. In fact, JPG is the default setting here, so it’s super easy. You can keep the same file name or go ahead and replace the number your phone gave the file and choose a better name.
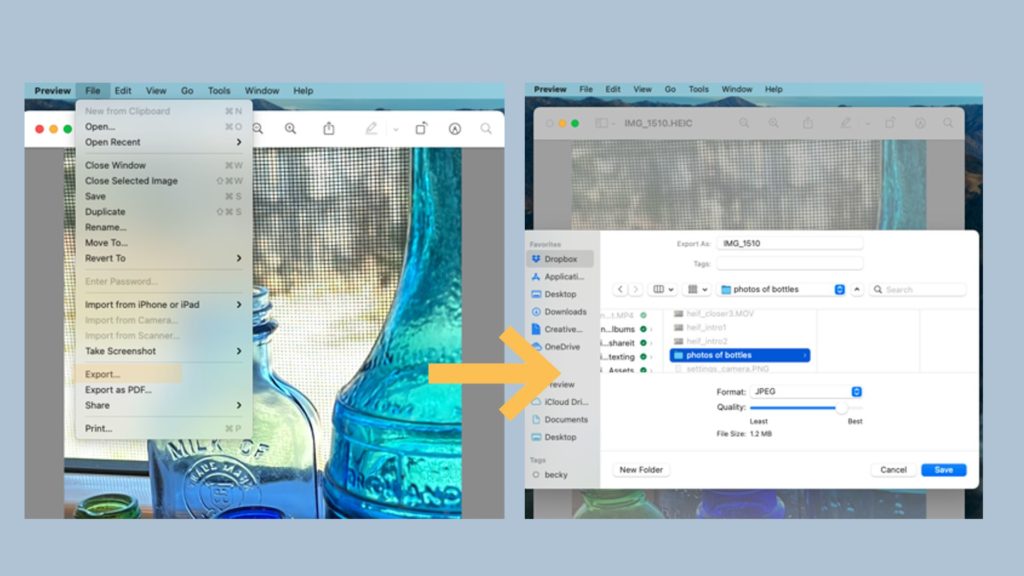
If you have the photo stored somewhere else on your computer, all you need to do is to open your photo with the Mac’s “Preview” feature. Then, follow the same steps as in iPhotos to export as a JPEG or PNG file.
How To Convert on PC
To convert a HEIC file on a PC, you’ll need to download an app to your computer. These three are popular recommendations:
- iMazing HEIC Converter
- Apowersoft HEIC Converter
- Pixillion Image Converter
To learn more about how to convert on a PC, here’s a great source.
Taking Charge of Your Photos
I hope you have a good understanding now of how to set up your iPhone to automatically export your photos as JPEGS and also how to convert those that are already on your computer.
Having control of the type of image file you are using and sharing will give you a solid foundation for creating and sharing a digital collection of your photos.
If you need more help with how to share photos from your phone to your computer or with others, go check out our Tech Help library. We have 3 articles with videos there to show you all you need to know.
Tech Support for Sharing Photos with AirDrop and ShareIt
Tech Support for Sharing Photos with Emails From Your Phone
Tech Support for Sharing Photos From Your Smartphone With Texting




0 Comments