What is this magic editing tool, you ask? Stay with me and I’ll show you what I’m talking about.
Getting Started
The instructions and information in this article are based on the iPhone’s iOS 15, so if you have problems following along, check your operating system to see if you need to upgrade. If you aren’t sure how to do that, check out this article here on our site where I’ve included that information – “Tech Support for Memorable Family Selfies.”
The Magic of the AUTO tool
So here’s the magic tool I want to show you. Those talented Apple engineers have given us all the gift of the AUTO adjustment. Your phone’s amazing computer software analyzes your photo and uses its AI (artificial intelligence) to determine how it can be improved. Then it applies adjustments across the full range of editing settings.
The settings that are usually adjusted using Auto are Exposure, Brilliance, Highlights, Shadows, Contrast, Brightness, Black Point, Saturation, and Vibrance. There are also settings available to you for Warmth, Tint, Sharpness, Definition, Noise Reduction, and Vignette. In future articles and videos we’ll be looking closely at all of these settings, but for now, let’s see how using Auto can make a quick improvement.
Quick & Easy
To use the Auto adjustments, tap Edit at the top right of your screen if you have opened a photo from the Photo Library. Or tap Edit in the bottom toolbar if you have just snapped your photo.
Now that you are in the Photo Editor, look for the magic wand icon right in the center below your photo. That makes complete sense since it feels like magic sometimes! Tap to see what changes it makes.
Like what you see? Then tap Done and it is saved to your Photo Library in its new edited form. Be aware that the photo is now updated throughout your iCloud library. Don’t tap Done unless you are finished editing.
Don’t like how the new photo looks? No problem! Just tap “Cancel” and then “Discard Changes” to release those new settings. It’s just that simple.
Case Studies
Here are a couple of Case Studies for you to get an idea of how this works.
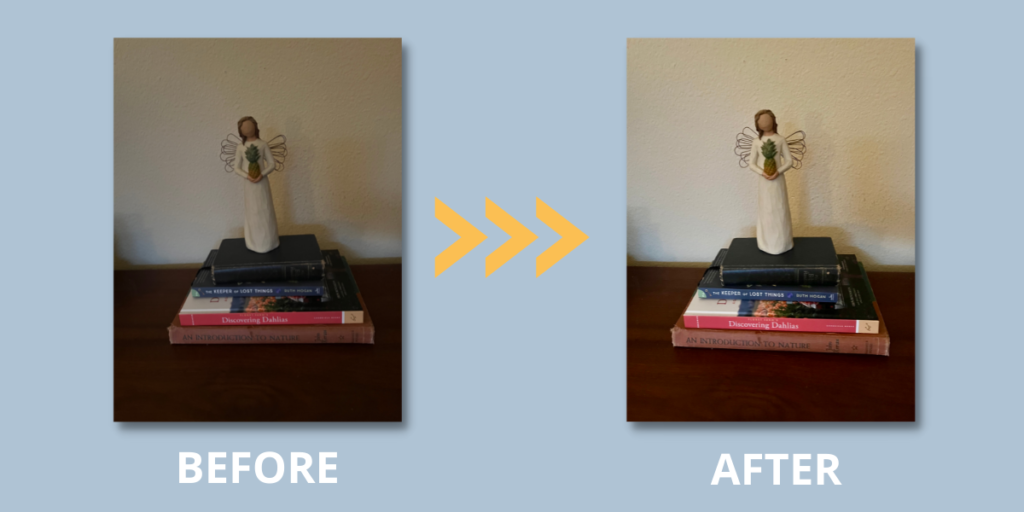
Case Study No. 1 – Photo is too dark
I intentionally took this photo to make it too dark and it’s a great example of how the Auto adjustments can make a nice difference. This photo still needs a little work to look its very best, but the adjustments Auto made get us off to a great start!
The Auto adjustments to this photo included increasing the Exposure, Brilliance, Shadows, Contrast, Brightness, Black Point, and Saturation. The Highlights were reduced a bit.
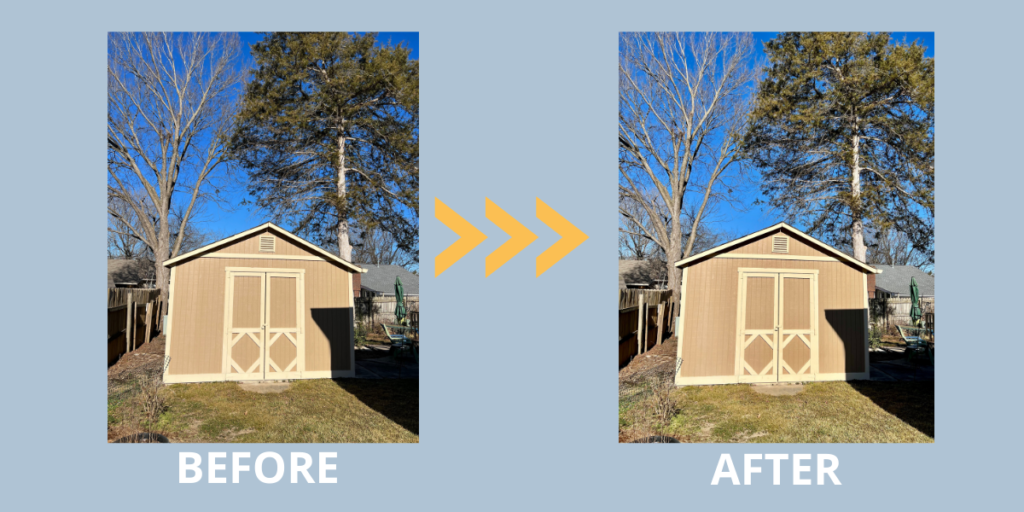
Case Study No. 2 – Photo is too bright
The sun’s reflection off the wall of the shed make this photo a bit too bright and the deep shadow on the right side of the screen adds to the strong contrast. Let’s see what Auto adjustments were made.
To start, the Exposure was left exactly as the photo was shot. The Brilliance setting was enhanced a good bit and then the Highlights were reduced. Increases in Shadows, Contrast, Brightness, Black Point, and Saturation were made. While the visual differences in the “Before” and “After” photos aren’t extreme, I agree with the changes. The “After” photo has more texture and a better balance.
For Our Android-User Friends
While we’ve been focusing on using the onboard photo editor for the iPhone, I know that so many of you take your photos with Android and Google phones. Even though I don’t own one of these, I haven’t forgotten you! I will always try to find a good online source for you to continue your learning. Here’s a good one.
Now It’s Your Turn to Experiment
To truly get the feel for what the Auto adjustments can do for your photos, you’ve just got to give it a test drive. Take some new photos or grab some from your photo library and give the Auto tool a whirl. Let me know in the comments or through a DM to our Instagram or Facebook accounts what you liked and what you disliked. Let’s help each other discover the best ways to take great photos!
As we continue this series on editing photos, is there something you want to learn? Please comment below and let us know! Thanks for reading.


0 Comments