If you are looking for ways to improve the photos that you are taking with your iPhone, then you have come to the right place! We have lots of articles and videos available for you that show you how to crop and straighten your photos, use the iPhone’s auto adjustment settings and more. Check them out.
In this article, let’s dig into how making adjustments to the Exposure and Brilliance settings for your photos can improve them.
Getting Started
This tutorial is based on the iPhone’s iOS 15, so if you have problems following along, check your operating system to see if you need to upgrade. If you aren’t sure how to do that, check out this article – “Tech Support for Memorable Family Selfies.“
Changes to Exposure
If you have ever used software like Photoshop or Lightroom for editing photos, then you probably have a good idea of what the Exposure settings mean. Exposure is controlled by the amount of light that reaches your camera’s sensor.
Using the editor to adjust Exposure can help with problems such as overexposure where the photo is washed out from too much light. Or changing the settings can help if the photo had too little light and was underexposed.
The good news is that our phone’s cameras are nearly experts when it comes to judging how much light to let in. Any adjustments that you will be making will be small. That’s not to say though that you can’t have some fun with creating your own unique photos by adjusting the Exposure.
One more thing to keep in mind is that many photographers believe that you should always adjust your Exposure to bring the best focus to the subject of the photo. It has been said that the eye will forgive under or overexposure in the background or some other non-essential part of the photo. For the main subject, though, the Exposure needs to be just right.
Let’s look at a couple of examples of how changes in the Exposure settings can tweak a photo to make it more interesting.
Exposure Case Study No. 1
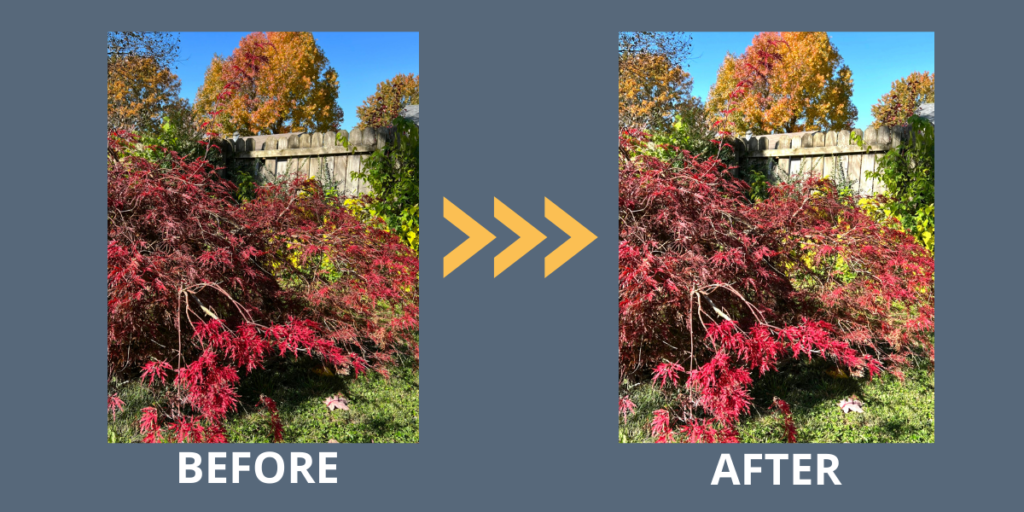
My editing goal is to use a change in the Exposure settings to bring out the beautiful red Japanese maple bush in the foreground. With so much vivid autumn color in this photo, it’s blending in. I increased the Exposure to 33 to enhance the red colors of the bush.
Exposure Case Study No. 2
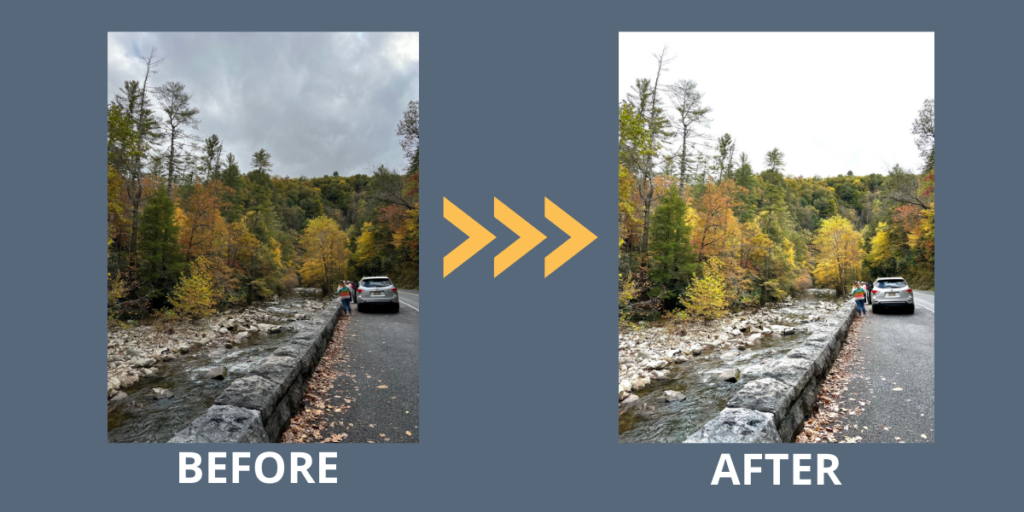
With this photo from the Smoky Mountains, my goal is to highlight the river on the left side of the screen. By increasing the Exposure by 70 I was able to take away the dominant gray sky and bring out the trees and the complexity of the river rocks.
Changes to Brilliance
Now let’s look at changes using the Brilliance setting. The Brilliance tool in the editor is kind of a combo tool. It applies changes to brighten dark areas, pull in highlights, and add contrast to reveal hidden detail. Overall it can make your photo look richer and more vibrant. Brilliance is a color-neutral adjustment, which means that no saturation is applied. I’ve noticed that when you ask your iPhone to make Auto adjustments, there are almost always pretty big changes made using the Brilliance setting. So that tells me that it is a powerful tool.
Let’s look at how making changes to the Brilliance settings can improve a couple of photos.
Brilliance Case Study No. 1
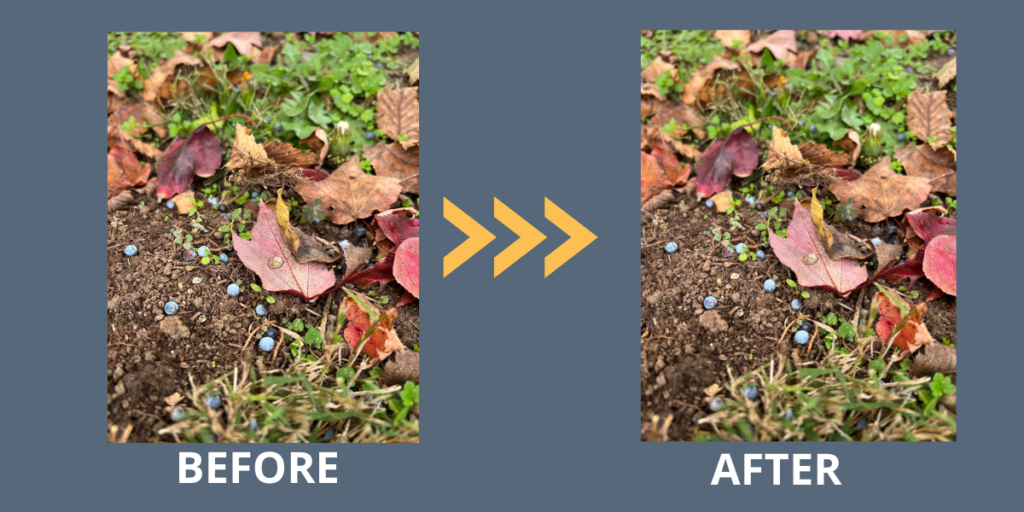
I took this photo of autumn leaves and other plants last fall and wanted the focus to be on the blue berries that drop from the Eastern Red Cedars in my backyard. I increased the Brilliance by 30 to highlight the different textures. I like the changes!
Brilliance Case Study No. 2
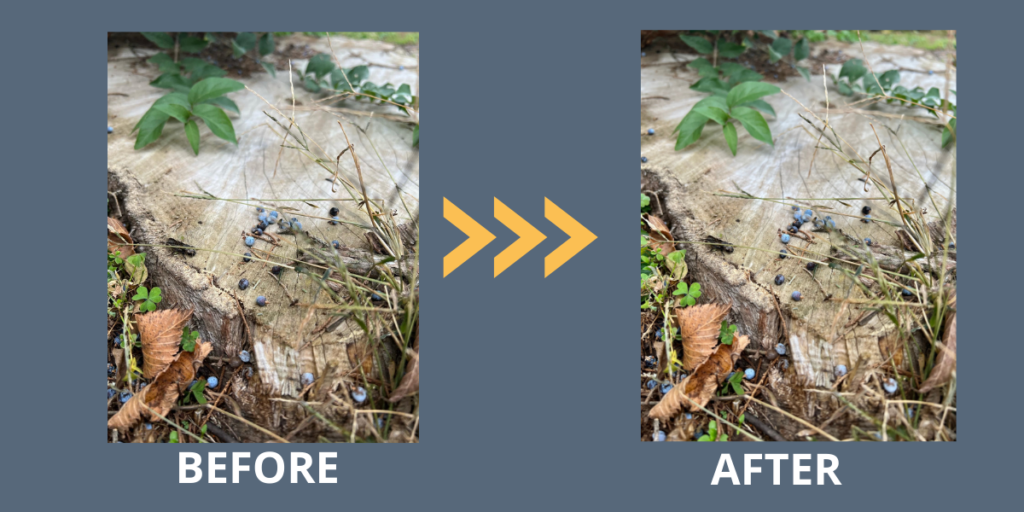
My goal with this photo was to use the background of the stump as a good palate for the leaves and grass. But in my opinion, it ended up being a little dull. The Brilliance is increased to 41, bringing more light and accent to the different layers.
Bonus
 If you are interested in how to adjust the Exposure for your phone’s camera before you take your photo, pay attention to this! Because it’s a smartypants, your “smart” phone is usually going to make its own judgment about how much light to let into the sensor based on what it believes the subject of your photo will be. And let’s not forget how smart your camera is when it comes to exposure!
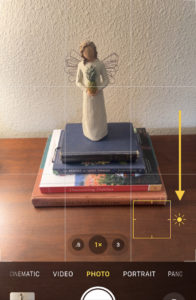
But if you want to be creative and shed a little more light on your subject, tap somewhere on your screen where it’s darker. A yellow box with a little sun will appear. Tap on the sun and slide it up and down to allow more light. You can preview this before taking the shot.
If you want less light on your subject, do the opposite. Tap somewhere on the screen where it’s brighter and adjust to make your subject a little darker.
For Our Android-User Friends
While we’ve been focusing on using the onboard photo editor for the iPhone, I know that so many of you take your photos with Android and Google phones. Even though I don’t own one of these, I haven’t forgotten you! I will always try to find a good online source for you to continue your learning. Here’s a good one.
Now It’s Your Turn to Experiment
I hope you’ll take the time to edit some of your photos to learn more about how Exposure and Brilliance can make a difference. The more you edit your photos the more you will learn what is possible. Happy editing!
As we continue this series on editing photos, is there something you want to learn? Please comment below and let us know! Thanks for reading.


0 Comments